
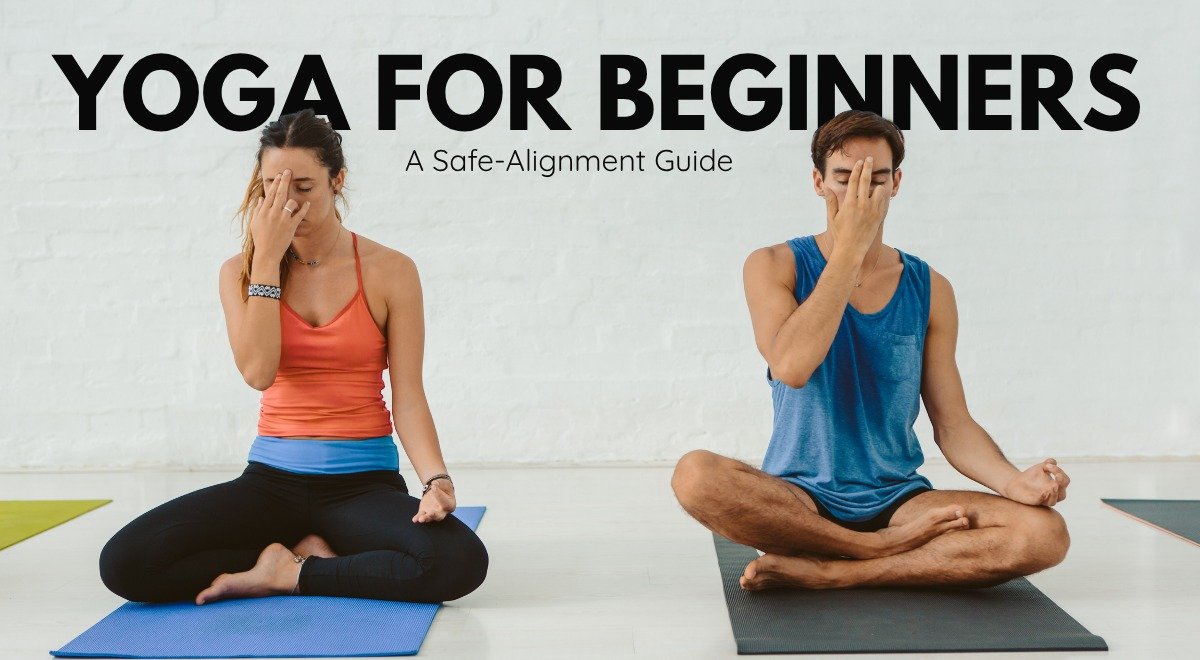
Yoga for beginners is the practice of learning foundational postures, breathing techniques, and body awareness in a way that improves mobility, reduces stress, and protects joints from common alignment mistakes. The first month is about building safe habits — not flexibility, not strength, not advanced poses — so the practice you start is the practice you can stay in.
Walk into any beginner class and you can spot the newest students by their hands. The fingers float, the heels of the palms dig in, and the elbows lock backward into a hard line during the first downward dog. Nobody told them that the wrist takes the bill for that. This is the part of starting yoga that the pose photos never show, and it is where most early aches actually begin.
Something else has shifted in who shows up. For years, people came to the mat to get bendier. According to Yoga Alliance’s Yoga in the World research, released in 2023, stress relief has overtaken flexibility as the top reason people in the United States and several other countries start practicing, and roughly 38 million Americans now practice in some form. The beginner who walks in now is often tense, desk-bound, and looking for a calmer nervous system before a deeper backbend. That changes how a first month should be taught.
Reader takeaway: You do not need to be flexible, athletic, or already calm to start. You need a few safe positions for your joints and a way to notice when a stretch has turned into a strain.
The rest of this guide is built around that idea. We will cover what beginner yoga actually is, how it differs from Pilates, which styles suit a first month, what changes in your body, how to read the early warning signs in your knees, wrists, and lower back, and what to do when something feels off. If you are in Singapore and would rather start with a teacher watching your alignment, Ojas Yoga in the CBD runs beginner-friendly Hatha, Yin, and Vinyasa classes, with a 3-class trial pass for first-timers. Everything in this guide is the same teaching framework we use in those rooms.
What is yoga for beginners, and how is it different from Pilates?
Beginner yoga is the practice of basic postures, called asanas, paired with deliberate breathing, called pranayama, to build mobility and a steadier mind. Pilates shares the floor work and the focus on control, but it is built around core strength and repetition rather than breath-led holds and stillness.
The clearest way to feel the difference is in a single position. In a yoga forward fold you settle and let the breath lengthen the back of the legs over several slow rounds. In a Pilates roll-down you move with precise, repeated control to load the abdominals. Both are useful. They are simply answering different questions. If you are weighing the two, this comparison of yoga and Pilates goes deeper than the table below.
| Feature | Beginner yoga | Beginner Pilates |
|---|---|---|
| Primary aim | Mobility and stress relief | Core strength and stability |
| Movement style | Held postures, flowing transitions | Controlled, repeated reps |
| Breath role | Central; breath leads the movement | Supportive; breath aids control |
| Typical equipment | Mat, blocks, strap | Mat, reformer, small props |
| Mental component | Explicit, through stillness and breath | Implicit, through concentration |
One thing worth clearing up early: yoga did not begin as a workout. The system most modern classes draw from traces to Patanjali’s eight-limbed path, where physical postures are only the third limb. The breath, attention, and other limbs sit alongside the poses. Modern beginner classes lean heavily on the physical limb because it is the most accessible doorway, and that is fine. It just helps to know the doorway is not the whole house.
People also ask whether you can lose weight with beginner yoga. Gentle styles burn modest calories, so they are better understood as a way to build a consistent movement habit and reduce stress eating than as a fast fat-loss tool. The early wins are usually better sleep, looser hips, and a calmer head.
Which styles of yoga are best for beginners?
For most beginners, Hatha, Vinyasa, and Yin or restorative yoga cover the useful range. Hatha teaches alignment slowly, Vinyasa adds gentle movement linked to breath, and Yin and restorative styles use long, supported holds for deep tissue release and stress relief.
Start with Hatha if you want time to learn the shapes. The pacing is slow enough that an instructor can correct your stance before you have loaded the joint, which is exactly what a new body needs. Hatha is also the style I most often steer people over 40 toward first, and a quick read on the benefits of Hatha yoga explains why it ages so well as a foundation.
Many beginners at Ojas Yoga start with Hatha for two or three weeks before adding Vinyasa, because the slower pace lets alignment habits form before speed is introduced. The reverse order is harder: speed tends to lock in whatever shape the body defaults to, including the shapes that hurt.
Vinyasa is where movement enters. Poses connect into short sequences, often built on the Sun Salutation, and you breathe in a steady rhythm as you flow. It feels more like exercise and can raise your heart rate into an easy aerobic zone, but the same flow that makes it engaging also makes it easy to rush. Beginners who learn the basic sequence before joining a faster class tend to keep their form together when the pace picks up. If you are class-shopping, this guide to finding a beginner-friendly Vinyasa class is a good filter.
Yin and restorative yoga are the quiet end. You hold supported shapes for minutes at a time, letting connective tissue and the nervous system settle. For the stressed, sleep-deprived beginner, this is often the most valuable style to add, even one session a week. It asks almost nothing of your flexibility to begin.
What you need to know: Pick one slow style to learn alignment and one calm style to recover. You can add faster flows once your joints know where they are supposed to be.
How yoga changes a beginner’s body, and the modern barriers in the way
In the first weeks, yoga improves joint range and body awareness, and tends to calm the stress response. The main obstacle is not stiffness; it is the desk-shaped body most beginners arrive with, where tight hips, a rounded upper back, and a forward-jutting neck change how every pose loads.
The benefits side is well supported. The National Center for Complementary and Integrative Health, part of the US National Institutes of Health, notes that yoga can help with stress, balance, and low-back pain for many people, while also cautioning that injuries do happen, usually from overdoing a stretch. Research has linked regular practice to lower stress markers and better heart-rate variability, which is part of why so many people now start for the calm rather than the bend.
The barrier side is where beginners get surprised. Years at a screen leave the hip flexors short and the upper back stiff. The rounded upper back has a name in the textbooks: thoracic kyphosis, the excessive forward curve of the mid-spine that desk work slowly bakes in.
What this usually feels like: neck tightness that does not ease with stretching, shoulders that creep up toward the ears by mid-afternoon, headaches after long screen sessions, and a strange reluctance to stand fully upright at the end of the day. The body has learned to live folded.
Drop that body into downward dog and the shoulders cannot rotate properly, so the lower back arches to compensate and the wrists absorb the load. The pose is not the problem. The starting posture is. If that sounds like you, a focused look at office yoga for postural correction is worth a detour before you chase advanced shapes.
This is where I teach what we at Ojas Yoga call the Somatic Alignment Safety Protocol. It is not a machine or a measured program. It is a body-awareness checklist a beginner runs through in every weight-bearing pose, and it grows out of the somatic approach to yoga the studio teaches. The point is to feel the joint before you load it, so the body, not the floor, decides how far you go. Five cues carry most of the work:
- Ground the base. Spread the contact points first, whether that is the whole hand or the four corners of the foot, before any weight arrives.
- Engage before you extend. Switch on the muscles around a joint before deepening into a stretch, so the joint is stabilized, not dangling.
- Keep a micro-bend. Never lock a knee or elbow at full straightness. A soft bend protects the joint from hyperextension.
- Breathe through the transition. If you are holding your breath, you are pushing too hard. Move on the breath, not against it.
- Back off at sensation, not pain. Stretch is a broad, tolerable pull. Pain is sharp, pinpoint, or in a joint. The first is fine; the second means retreat.
None of this is exotic. It is simply the order an experienced body uses without thinking, written down so a new one can borrow it.
What happens during your first 30 days of yoga?
The first 30 days of beginner yoga follow a fairly predictable arc: positional learning in week one, reduced stiffness in week two, breath and stress changes in week three, and the first noticeable shifts in flexibility and sleep by week four. The mental effects arrive earlier than the physical ones.
Knowing the arc matters because the timing surprises most beginners. They expect a body that looks different. They get a nervous system that feels different first, then the body catches up. Quitting in week two because the flexibility has not arrived means quitting just before the part that does.
| Phase | What is happening in the body | What you actually notice |
|---|---|---|
| Week 1 | The nervous system is learning new positions. Muscles you have not used in years are being asked to participate. | Confusion in poses, mild general soreness, surprise at how much energy it takes to hold simple shapes. |
| Week 2 | Initial stiffness eases. Joints that were not moving through their full range start to do so again. | Hips feel less locked. Mornings are slightly less stiff. The same poses feel less foreign than last week. |
| Week 3 | Breath awareness becomes more automatic. The parasympathetic nervous system gets more practice settling. | Calmer sleep, a steadier mood through the workday, less reactive responses to small stressors. |
| Week 4 | Flexibility gains become measurable. Postural changes are starting, though not yet visible to others. | Forward folds reach further. You can sit cross-legged more comfortably. Energy in the afternoons is steadier. |
The visible postural changes — the kind other people start to comment on — usually take two to three months of consistent practice. The internal changes come first by a wide margin. If you only get four weeks in and feel nothing has happened, look at your sleep and your mood rather than the mirror.
How do you protect your wrists in yoga? The hand protocol
The wrists take the most beginner damage in yoga, and it is almost always because the hand is collapsing rather than the wrist itself being weak. A specific five-step hand setup — known in some teaching traditions as Hasta Bandha, or “hand lock” — converts every weight-bearing position from a wrist stress test into a wrist strengthening exercise.
What this usually feels like: a dull ache at the heel of the palm during Downward Dog, a sharper pinch at the outer wrist when you press into Plank, and a slow stiffness in the forearms after class. None of it is a sign that yoga is bad for your wrists. It is a sign that the hand is letting the wrist do work the fingers should be doing.
Run these five steps before every weight-bearing hand position:
- Spread the fingers wide. Maximum spread, every finger active, creating the largest possible base of support. Most beginners place their hands and leave the fingers passive, which puts all the load on the heel of the palm.
- Press the finger pads into the mat. The soft pads at the base of each finger, not the knuckle joints, should bear equal weight across all eight contact points. If you press only with the palm, the wrist becomes the hinge under load.
- Dome the palm slightly. Create a small lift in the centre of the palm, as if a marble were sitting underneath it. This is Hasta Bandha. It lifts the carpal tunnel off the mat and shifts the load from the wrist joint to the active hand muscles.
- Root through the index finger mound. The base of the index finger tends to lift in beginners, which shifts weight to the outer wrist where it pinches. Actively press that mound down and you will feel the forearm rotators engage. The whole wrist complex stabilises.
- Roll the inner elbows forward. External rotation of the upper arm draws the shoulder blades down the back and takes the shoulder joint out of impingement. The wrists stop carrying the entire body alone.
The first two weeks of doing this will feel effortful, because the small hand muscles are undertrained in people who type for a living. By week four, the engagement becomes automatic and the wrist pain that drove most beginners away simply stops appearing. If your wrists are already sensitive enough that even a corrected setup hurts, a beginner can do a surprising amount of practice from the forearms or a soft fist for the first few weeks while the hand learns to hold its shape.
How do you spot poor alignment and common beginner mistakes?
The three highest-risk errors for beginners are locking the knees in standing poses, letting the lower back collapse in downward dog, and holding the breath during hard shapes. Each has a simple visual or physical tell, and each is fixable with a single cue once you know what to watch for.
Start with the knees. In standing poses, beginners often push the knee back until it locks, which feels stable but hands the load to the joint and its ligaments instead of the muscle. The fix is the micro-bend from the protocol: a knee that is straight but not jammed.
What this usually feels like: a vague ache at the inner knee after class, or a sense that the front thigh is doing all the work while the hip feels uninvolved. Both indicate knee-dominant rather than hip-driven movement. If your knees already complain, a dedicated routine for yoga and knee pain is a safer on-ramp.
There is a quick self-check for Warrior II that catches most knee errors. Look down at your front knee. If you cannot see your big toe past the inside of the knee, the knee has either collapsed inward or traveled too far over the ankle. Both need correcting. Either shorten your stance until the knee comes back over the ankle, or press the outer edge of the back foot firmly into the mat. That outer-edge pressure activates the hip muscles that hold the knee in line.
The lower back is the next watch point, and downward dog is where it shows. If your hamstrings are tight, the only way to get your heels down and your back flat is to let the pelvis tuck and the lumbar spine round or overarch. Do not. Bend the knees generously and lift the hips up and back instead. A bent-knee dog with a long spine is far better for a beginner than a straight-leg dog with a collapsed back.
What this usually feels like: a pinch or compression in the lower back after a sequence of dogs, or a tired, achy lumbar spine the morning after class. The muscle around the spine should feel worked, not the spine itself.
While you are there, a second self-check for the shoulders in Downward Dog: press the mat away from you actively with both hands. Imagine pushing the floor down and the hips further up at the same time. If you feel the space between your shoulder blades broaden as the upper back lifts, the shoulder blades are doing their job. If the upper back rounds further and your head drops below your arms, the shoulders have collapsed and the wrists are about to start complaining.
The breath is the quietest tell of all. Watch a new student attempt an unfamiliar balance and the breath simply stops. Held breath flips the body toward its stress response, which undoes much of why you came. The cue is almost comically simple: if you cannot breathe smoothly in a pose, you are too deep in it.
I have watched the same scene repeat for years. A capable, driven beginner treats the first month like a sport, chases the full expression of every pose, ignores the small wrist twinge, and is gone by week four. It is rarely a flexibility problem. It is a pacing problem, and pacing is teachable.
How do you prevent yoga injuries and burnout?
Most beginner injuries come from loading a joint past its current range, and most beginner burnout comes from doing too much too soon. Props that shorten the distance to the floor solve the first; short, frequent sessions solve the second. The Somatic Alignment Safety Protocol ties both together.
Props are not training wheels. A pair of blocks under your hands in a forward fold brings the floor up to you, so your hamstrings lengthen at a safe angle instead of yanking. A strap looped around the feet lets you keep a long spine in seated stretches without hauling on the lower back.
There is a useful rule for block height in Triangle Pose, and it applies to almost every pose where a block sits under the hand. The block height is correct when your torso stays long and level, parallel to the floor. The block height is wrong when you are tipping toward the floor to reach it, or when the block forces your shoulder up into your ear. If you are tipping, the block is too low; raise it to the next height. If your shoulder is hiking up, the block is too high; lower it. Beginners almost always need a taller block than they think.
The wrists, the single most-strained area for beginners, benefit most from the hand protocol in the previous section. If wrist loading is already uncomfortable, a beginner can do a surprising amount from the forearms or a fist instead while the hand strength catches up.
Burnout is the quieter risk, and it is usually a scheduling error rather than a willpower one. A new practitioner who commits to one long weekly class often misses it, feels behind, and drifts off. The same person doing ten or fifteen honest minutes most days builds a habit that survives a bad week. The studio’s notes on keeping a practice consistent lean hard on that frequency-over-length principle, and it holds up.
If you want a concrete starting shape for week one, keep it small. Three short sessions of fifteen to twenty minutes, spaced across the week, with one of them a quiet Yin or restorative session, is plenty. Lead each one with two or three rounds of slow breathing, run the five protocol cues in your first weight-bearing pose, and stop while you still feel fresh. The goal of a first week is not to get sore. It is to come back.
What you need to know: Short and frequent beats long and occasional. Fifteen minutes a day, props within reach, is the most durable beginner schedule there is.
One more honest note on equipment. Beginners often over-buy. A decent non-slip mat genuinely helps stability and confidence; almost everything else can wait. If you are tempted by a cart full of gear, read what you actually need beyond a mat before spending.
When should a beginner stop and seek help?
Beginner yoga is forgiving, but it is not a substitute for medical assessment when something feels genuinely wrong. Stop the practice and seek a clinician if you experience sharp or pinpoint pain during a pose, numbness or tingling in any limb, pain that radiates down an arm or leg, joint swelling, dizziness that does not pass quickly, or any symptom that worsens after class rather than easing within a day or two.
The line between “this is just my body learning” and “this needs help” is easier to walk than most beginners think. The signs that warrant stopping are specific, and learning to recognise them early is part of the practice itself, not a sign you have failed at it.
Six signals that mean stop and assess, not push through:
- Sharp, pinpoint pain — pain that is concentrated at a small spot rather than spread across a muscle group. Sharp is the operative word. Stretch is a broad pull; sharp is a signal.
- Numbness or tingling — pins and needles in the hands, feet, or anywhere else means a nerve is being compressed. Come out of the pose immediately.
- Pain that radiates — discomfort that travels down a limb from its source, such as lower back pain that shoots into the leg, is a referral pattern that needs a clinician, not another class.
- Joint swelling or warmth — soft tissue around a joint that becomes puffy, hot, or visibly inflamed in the hours after class is not normal soreness. Rest, ice, and an assessment.
- Pain that worsens after class — DOMS eases over a day or two. Anything that gets worse rather than better in the 48 hours after a session is asking for attention.
- Dizziness, faintness, or breathlessness — yoga should leave you calmer, not lightheaded. Inversions or breath-holding can produce mild head-rush in beginners; persistent dizziness should be checked.
If any of these show up, the right next step is a physiotherapist, sports doctor, or a yoga therapist who can assess one-on-one. A good qualified instructor will tell you the same — being told to stop is not a setback, it is care.
What should you do about post-yoga soreness or a minor strain?
General, dull muscle soreness a day or two after class is normal and resolves with gentle movement and rest. Sharp, pinpoint, or joint pain, anything that lasts beyond a few days, or any numbness or tingling is not routine soreness and should be checked by a clinician before you return to the mat.
Use the table below as a quick decision tool when something is sore after class. The principle is simple: dull and diffuse is fine, sharp or localised is not.
| What you are feeling | Normal? | What to do |
|---|---|---|
| Dull, diffuse muscle soreness across both sides of the body | Yes | Gentle movement, hydration, Yin or restorative class, return in a day or two |
| Mild stiffness in newly used muscles | Yes | Light walk, easy mobility, normal practice the next day |
| Sharp, pinpoint pain in a specific spot | No | Stop the aggravating pose, rest 48 hours, retest at reduced range |
| Pain inside a joint rather than a muscle | No | Rest, ice if accessible, assess before next class |
| Numbness, tingling, or pins-and-needles | No | Come out of any aggravating posture and seek medical advice |
| Pain that radiates down a limb | No | Stop yoga entirely and see a clinician before resuming |
| Joint swelling, warmth, or visible inflammation | No | Rest, ice, evaluation by a physiotherapist or doctor |
| Soreness that gets worse 48 hours after class | No | Stop practising the aggravating sequence and seek assessment |
The first job is telling DOMS apart from a strain. Delayed-onset muscle soreness, the broad ache that shows up the morning after a new effort, is your muscles adapting. The signs are consistent. It is diffuse rather than localised. It is usually symmetrical, both hips or both hamstrings rather than one side only. It eases as you warm up and walk around. It fades within a couple of days. None of that means anything is wrong.
A strain feels different. It is localised to one spot rather than spread across a muscle group. It is sharper, often pinpoint, and it does not ease with movement; if anything it gets worse when you try to use the area. It may come with swelling or warmth at the site. Anything radiating, anything in a joint, or anything with numbness sits in a category beyond strain and warrants a clinician rather than another class.
For ordinary soreness, gentle active recovery usually beats sitting still. A slow walk, easy mobility, or a calm restorative session keeps blood moving without reloading the sore tissue. For a mild tweak, ease off the aggravating poses for a few days, drop your range by a third when you do return, and let it calm before testing the full shape again. Heat and hydration help a tired muscle; a sore joint usually wants the opposite, which is rest and a lighter load.
If you are in Singapore and want a recovery session that is genuinely passive — no load on the sore tissue, but enough nervous-system effect to speed things up — the Mid-Day Reset breathwork and sound bath at Ojas Yoga is built for exactly that. For complaints that are not resolving with class modifications, yoga therapy sessions provide individual assessment, which is sometimes the right step before another group class.
Recovery is where the next six months are quietly decided. The beginners who learn to back off for two days are the ones still practicing in two years.
Common questions beginners ask before their first month
How many times a week should a beginner practice yoga?
Two or three sessions a week is a strong, sustainable target for most beginners, but consistency matters more than volume. Several short sessions across the week build mobility and habit more reliably than one long class, and they leave room for rest days when something feels sore.
If three feels like a lot at first, start with what you will actually keep. A daily ten minutes is a real practice. You can always add length once the habit is steady.
Do you need to be flexible to start yoga?
No. Flexibility is a result of practicing yoga, not a requirement for starting it. Beginning while stiff is completely normal, and props plus modifications let a tight body work safely in every foundational pose from day one.
This is the single most common reason people talk themselves out of starting, and it is the easiest myth to retire. The mobility comes with the weeks. Arriving stiff just means you have more room to gain. If stiffness has been your excuse, it has been a bad one.
What is the best pose for an absolute beginner to know first?
Child’s Pose, or Balasana, is the single most useful pose for a beginner to know before anything else. It is the reset position you can return to at any point in any class when you need a moment to breathe or recover.
The benefits are not small. It passively decompresses the lower back, opens the hips gently, and the forward-folded shape is one of the quickest ways to settle a busy nervous system. A beginner who knows they can always drop into Child’s Pose practices with less fear, which means they practice more honestly. Learn it first.
What should you eat before a yoga class?
No full meal within 90 minutes of class. A light snack 30 to 45 minutes before is fine if you need it; a banana, a date, a small handful of nuts. Yoga includes forward folds, twists, and inversions that press on the digestive organs, and a full stomach makes all of them uncomfortable.
After class, a light meal with some protein within the first hour helps the recovery that the session started. Water before, during, and after is more important than food.
Is yoga safe if you have lower back pain?
For most desk-related lower back pain, yes, with appropriate modifications. The pattern behind most office-worker back pain — tight hip flexors and weak deep core — is exactly what beginner yoga addresses when it is taught well. For specific or persistent conditions, a yoga therapy session before joining a group class is the safer route.
The modifications that make yoga safe with a sore lower back are the same ones that make it useful: a block under the sitting bones in seated postures, bent knees in forward folds until the pelvis can tilt forward without rounding the back, and patience with backbends until the deep stabilisers are strong enough to protect the spine. If your back pain is sharp, radiating, or recent, see a clinician before the next class.
What equipment does a beginner actually need?
A non-slip mat is the only essential. A pair of blocks and a strap are the two highest-value additions because they make forward folds and seated stretches safer for tight bodies. Everything beyond that is optional and can wait until you know your practice.
Buy the mat that keeps your hands and feet from sliding, since stability is what protects beginner joints and builds early confidence. For a first class at Ojas, you do not need to bring anything — mats, blocks, and straps are provided.
How long before you see results from beginner yoga?
The mental effects come first, often within two or three weeks: calmer sleep, a steadier mood, less reactive stress. Flexibility improvements are usually noticeable within a month of two or three sessions a week. Postural changes, the kind other people start to comment on, take longer, usually somewhere between two and three months of consistent practice.
The order matters. Beginners who expect the visible changes first often quit before the invisible ones land. The nervous system tends to respond before the muscles do.
How do you start a yoga practice that lasts?
The goal of beginner yoga is not to master poses. It is to build a body that moves better, a nervous system that settles faster, and a practice you still enjoy six months from now. The poses are the means, not the point.
If you have a slow style picked and a couple of blocks within reach, the next decision is simply where you will practice this week, whether that is a quiet corner at home or a class with someone watching your alignment. For readers in Singapore, Ojas Yoga in the CBD is where the framework in this guide is taught directly. The group class schedule includes beginner-appropriate Hatha, Yin, and Vinyasa across morning, lunchtime, and evening slots, and the 3-class trial pass lets you sample formats before committing. If you would rather start with an instructor focused entirely on you for the first session, a private session applies the Somatic Alignment Safety Protocol to your specific body before you join a group room.
Wherever you start, the right first month is the one that brings you back for a second.


