Most lower back pain is not caused by a single dramatic injury. It builds up from long stretches of sitting, weak or tight muscles around the spine, and hips that have stopped moving through their full range. Yoga helps because it works on all three at once: it mobilises the spine gently, stretches what has tightened, and asks the muscles that support the lower back to switch back on.
Below are ten poses commonly used in yoga therapy for non-specific lower back pain, with the steps for each one and the mistake that most often undoes the benefit. If you want to understand why yoga therapy works for back pain before you get into the poses themselves, our overview of yoga therapy for back pain covers that ground; this guide picks up from there with the actual instructions.
When does yoga help lower back pain, and when should you see a doctor first?
Yoga is well suited to the most common type of lower back pain: dull, general soreness linked to posture, prolonged sitting or deconditioning, without any specific injury behind it. It is not a substitute for medical assessment when something more specific is going on.
See a doctor or physiotherapist before starting any of these poses if you have:
- Numbness, tingling or weakness running down one leg, which can point to nerve involvement.
- Back pain that started after a fall, accident or other clear trauma.
- Loss of bladder or bowel control alongside back pain, which needs urgent medical attention.
- Back pain with unexplained weight loss, fever, or pain that is worse at night and does not ease with rest.
- A known disc herniation, spinal stenosis or recent spinal surgery, where certain movements need to be avoided entirely rather than modified.
If none of those apply and your pain is the general, activity-related kind, the poses below are a reasonable place to start. If you are pregnant, several standard back-pain poses need modifying for a changing centre of gravity and a growing belly; go to our trimester-by-trimester prenatal yoga guide instead of this one.
How to practise these poses safely
- Work within a pain-free range. A gentle stretch is fine; sharp, shooting or radiating pain is not. Back off the moment you feel it.
- Move slowly, especially into and out of each shape. Most strain happens on the way in or out of a pose, not while holding it.
- Breathe throughout. Holding your breath tightens the muscles you are trying to release.
- Warm up first. A few rounds of Cat-Cow before anything more demanding wakes up the spine and reduces the chance of pushing into a stiff range too quickly.
- Stop and reassess if a pose consistently makes things worse, rather than pushing through it for several sessions hoping it settles on its own.
10 yoga poses for lower back pain
1. Cat-Cow (Marjaryasana-Bitilasana)
The standard warm-up for the spine and the pose most people should start with. It moves the lower back gently between flexion and extension without loading it.
- Start on hands and knees, wrists under shoulders, knees under hips.
- Inhale, drop your belly, lift your chest and tailbone (Cow).
- Exhale, round your spine, tuck your chin and tailbone (Cat).
- Repeat slowly for 8 to 10 breaths, moving with the breath rather than against it.
Common mistake: moving from the neck instead of the spine. Let the movement travel the full length of the back, not just the head and shoulders.
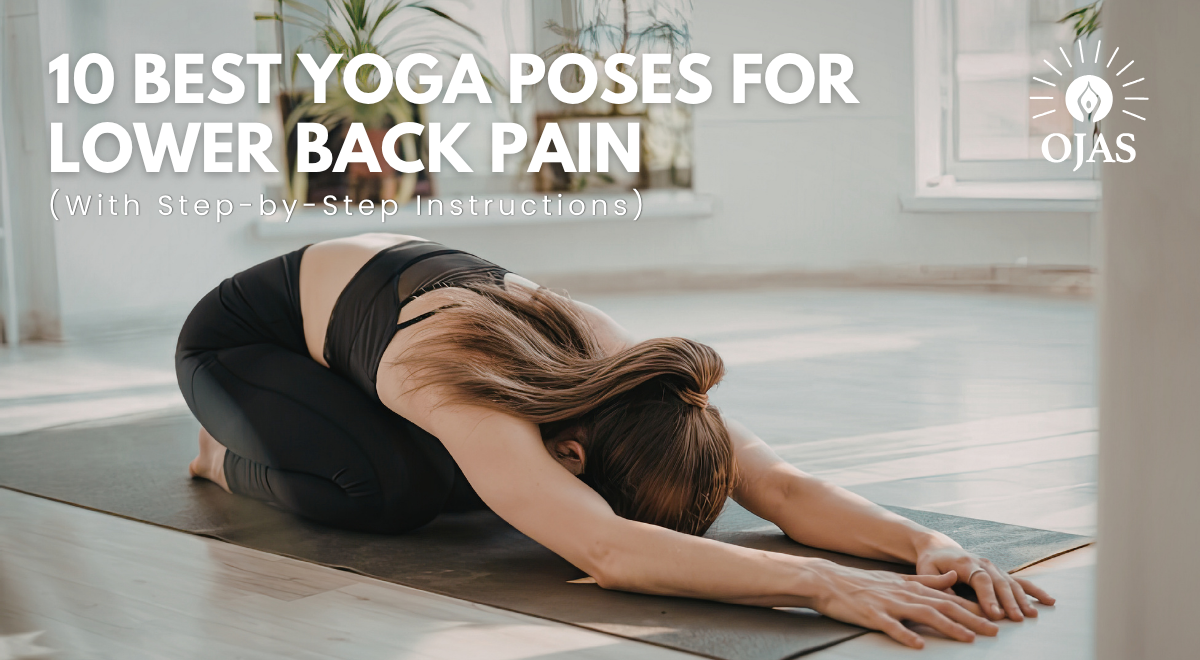
2. Child’s Pose (Balasana)
A resting stretch for the lower back and hips, useful between other poses or on its own when the back feels tight rather than sharply painful.
- Kneel with big toes touching, knees apart to about hip-width or wider.
- Sit your hips back towards your heels and walk your hands forward.
- Let your forehead rest on the mat, or on a block if it does not reach comfortably.
- Hold for 5 to 10 slow breaths, letting the lower back lengthen rather than actively stretching it.
Common mistake: forcing the hips all the way to the heels when the hips are tight. Widen the knees or sit up on a cushion instead of straining to close the gap.
3. Sphinx Pose
A gentle backbend that builds tolerance for spinal extension, which is often the direction people with back pain avoid most and therefore need most.
- Lie on your front, forearms on the mat, elbows under shoulders.
- Press your forearms down and lift your chest, keeping your lower ribs on the mat.
- Keep your shoulders away from your ears and your glutes relaxed rather than clenched.
- Hold for 5 to 8 breaths, only lifting as high as feels like a mild stretch across the lower back.
Common mistake: lifting too high, too soon. More height is not the goal; a comfortable, sustainable extension is.
4. Supine Twist (Supta Matsyendrasana)
A gentle rotation that releases tension along the sides of the spine and through the outer hip, done lying down so the spine is fully supported.
- Lie on your back, knees bent, feet flat on the mat.
- Let both knees fall to one side, keeping both shoulders on the mat.
- Extend your arms out to the sides, palms up, and turn your head the opposite way if that feels comfortable.
- Hold for 5 to 8 breaths, then repeat on the other side.
Common mistake: forcing both shoulders flat when the twist is deep. Let one shoulder lift slightly off the mat rather than straining to keep both pinned down.
5. Knees-to-Chest (Apanasana)
A simple, low-risk stretch that decompresses the lower back and is often the most immediately soothing pose on this list for general stiffness.
- Lie on your back and draw both knees towards your chest.
- Wrap your arms around your shins or behind your thighs if your knees are sensitive.
- Rock very gently side to side if that feels good, or simply hold still.
- Hold for 8 to 10 breaths.
Common mistake: pulling hard with the arms. Let gravity and a gentle hold do the work rather than yanking the knees in.
6. Bridge Pose (Setu Bandhasana)
Strengthens the glutes and hamstrings, which take pressure off the lower back when they are doing their share of the work in daily movement.
- Lie on your back, knees bent, feet flat and hip-width apart, heels close to your glutes.
- Press through your feet and lift your hips, squeezing your glutes at the top.
- Keep your ribs slightly tucked rather than flaring, to avoid overextending the lower back.
- Hold for 5 breaths, or lower and lift slowly for 8 to 10 repetitions.
Common mistake: lifting too high and arching through the lower back instead of the hips. Stop at the height where you feel the glutes working, not the lower spine.
7. Locust Pose (Salabhasana), gentle version
A light strengthening pose for the muscles that run along the spine, built up gradually rather than attempted at full intensity from the start.
- Lie on your front, arms alongside your body, palms down.
- Engage your lower back and glutes, and lift your chest and legs a small amount off the mat.
- Keep your neck long, gaze down rather than forward, to avoid straining it.
- Hold for 3 to 5 breaths, then rest. Repeat 3 to 4 times, lifting only a little each time.
Common mistake: lifting as high as possible on the first attempt. Start with a small lift and build height over weeks, not within one session.
8. Reclined Figure-4 (Supta Kapotasana)
Stretches the piriformis and outer hip, which sit close to the sciatic nerve and often refer tightness into the lower back when they are overworked.
- Lie on your back, knees bent, feet flat on the mat.
- Cross one ankle over the opposite thigh, just above the knee.
- Thread your hands behind the uncrossed thigh and gently draw it towards your chest.
- Hold for 5 to 8 breaths, then switch sides.
Common mistake: pressing the crossed knee down forcefully to deepen the stretch. Let the pull come from drawing the other leg in, not from pushing on the crossed knee.
9. Standing Forward Fold, knees bent
Releases the hamstrings and lower back together, done with soft knees so the stretch does not pull directly on a sensitive lower spine.
- Stand with feet hip-width apart, knees softly bent throughout.
- Hinge forward from the hips, letting your head and arms hang.
- Rest your hands on blocks, a chair seat or your shins if the floor is out of reach.
- Hold for 5 to 8 breaths, bending your knees further if the lower back rounds sharply.
Common mistake: locking the knees to reach further. Locked knees transfer more load to the lower back, which is the opposite of what this pose is for.
10. Legs-Up-The-Wall (Viparita Karani)
A fully supported resting pose that takes all load off the lower back, useful as a closing pose or on its own after a long day on your feet.
- Sit sideways next to a wall, then swing your legs up the wall as you lower your back to the floor.
- Shuffle your hips as close to the wall as is comfortable.
- Let your arms rest by your sides, palms up.
- Stay for 3 to 5 minutes, breathing slowly.
Common mistake: straightening the knees fully if the hamstrings are tight, which tilts the pelvis and can pull on the lower back. A slight bend in the knees is fine.
A simple 15-minute sequence for lower back pain
Practised in this order, the poses move from mobilisation to strengthening to full rest, which gives the lower back a complete, low-risk session rather than an unstructured list of stretches.
- Cat-Cow, 8 to 10 rounds
- Child’s Pose, 5 breaths
- Sphinx Pose, 5 to 8 breaths
- Knees-to-Chest, 8 breaths
- Supine Twist, both sides
- Bridge Pose, 8 to 10 repetitions
- Locust Pose, 3 to 4 gentle lifts
- Reclined Figure-4, both sides
- Standing Forward Fold, knees bent, 5 to 8 breaths
- Legs-Up-The-Wall, 3 to 5 minutes
Three to four sessions a week is a reasonable starting frequency. If sitting for long periods is a large part of what triggers your pain, our guide to office yoga for postural correction covers shorter versions you can fit between meetings.
What to avoid if you have lower back pain
- Deep forward folds with straight legs and a rounded spine, such as touching the toes from standing. These load the lower back exactly where it is already under strain.
- Deep twists in the acute phase of an injury. Gentle, supported twists like the supine version above are usually fine; standing or seated twists taken to a deep end range are not the place to start.
- Any pose that reproduces pain running down the leg. Stop immediately rather than working through it; this is one of the clearer signs to get it checked rather than self-treat.
- Rushing straight into strengthening poses cold. Always mobilise first with Cat-Cow before asking the lower back to work harder in poses like Bridge or Locust.
Good alignment matters more here than in most areas of practice, because a poorly aligned pose can quietly load the lower back instead of relieving it. Our safe alignment guide for beginners covers the general principles that apply across every pose on this list.
Common questions about yoga for lower back pain
Can yoga cure lower back pain completely?
For pain linked to posture, tight muscles and deconditioning, consistent practice often brings meaningful relief, but “cure” oversells what any single approach can promise for a body already carrying years of habits. Yoga works best as one part of a routine alongside general movement, and it is not a substitute for treating an underlying structural issue if one exists.
How often should I do these poses?
Three to four short sessions a week tend to produce steadier results than one long session, because the lower back responds better to frequent, gentle input than to occasional intense stretching.
Is yoga safe for sciatica?
Gentle poses that avoid deep forward flexion, like the reclined and supported versions above, are often well tolerated. Sciatica can have several different causes, so get a diagnosis first if the leg pain is new, severe or worsening, rather than guessing which poses will help.
Which pose gives the fastest relief?
Knees-to-Chest and Legs-Up-The-Wall are usually the most immediately soothing for general stiffness, because they take load off the spine rather than asking it to move or work. They are a reasonable place to start on a day when your back feels worse than usual.
Can I do these poses if I have a herniated disc?
Some of these poses, particularly forward folds and deep twists, may not be appropriate depending on the location and severity of the herniation. Get clearance from a doctor or physiotherapist first, and consider working with a yoga therapist who can adapt the sequence to your specific diagnosis rather than following a general list.
Practise with guidance that adapts to your back
A written guide can show you the shape of a pose, but it cannot see whether your particular back is compensating in a way that undoes the benefit. That is where a class with live feedback earns its place, especially in the first few weeks of building a new routine.
Our instructors at Ojas Yoga & Wellness routinely adapt sequences for students managing lower back pain, across our studios in Joo Chiat, Shenton Way and Serangoon Road. You can browse our yoga classes in Singapore and let an instructor check your form on these poses in person.